When it comes to affordable baking, it’s hard to beat shortbread.
This simple recipe requires just three ingredients, does not require an electric mixer, is beginner-friendly, and yields a buttery, melt-in-your-mouth biscuit that is perfect for stocking up the biscuit tin all year long.
What is shortbread?
Shortbread is a traditional Scottish biscuit known for its simple ingredients and rich, buttery taste. Originally a luxury reserved for special occasions like Christmas and weddings in medieval Scotland, shortbread has remained a timeless favourite. Its high butter content creates a tender, melt-in-your-mouth texture that’s irresistibly crumbly and satisfying. The simplicity of shortbread also makes it endlessly versatile – whether adding a hint of vanilla, a zest of lemon, or transforming it into indulgent millionaire shortbread with layers of caramel and chocolate. Don’t be afraid to get creative and experiment with any extracts or flavours you have tucked away in the cupboard!
Why you’ll love baking shortbread
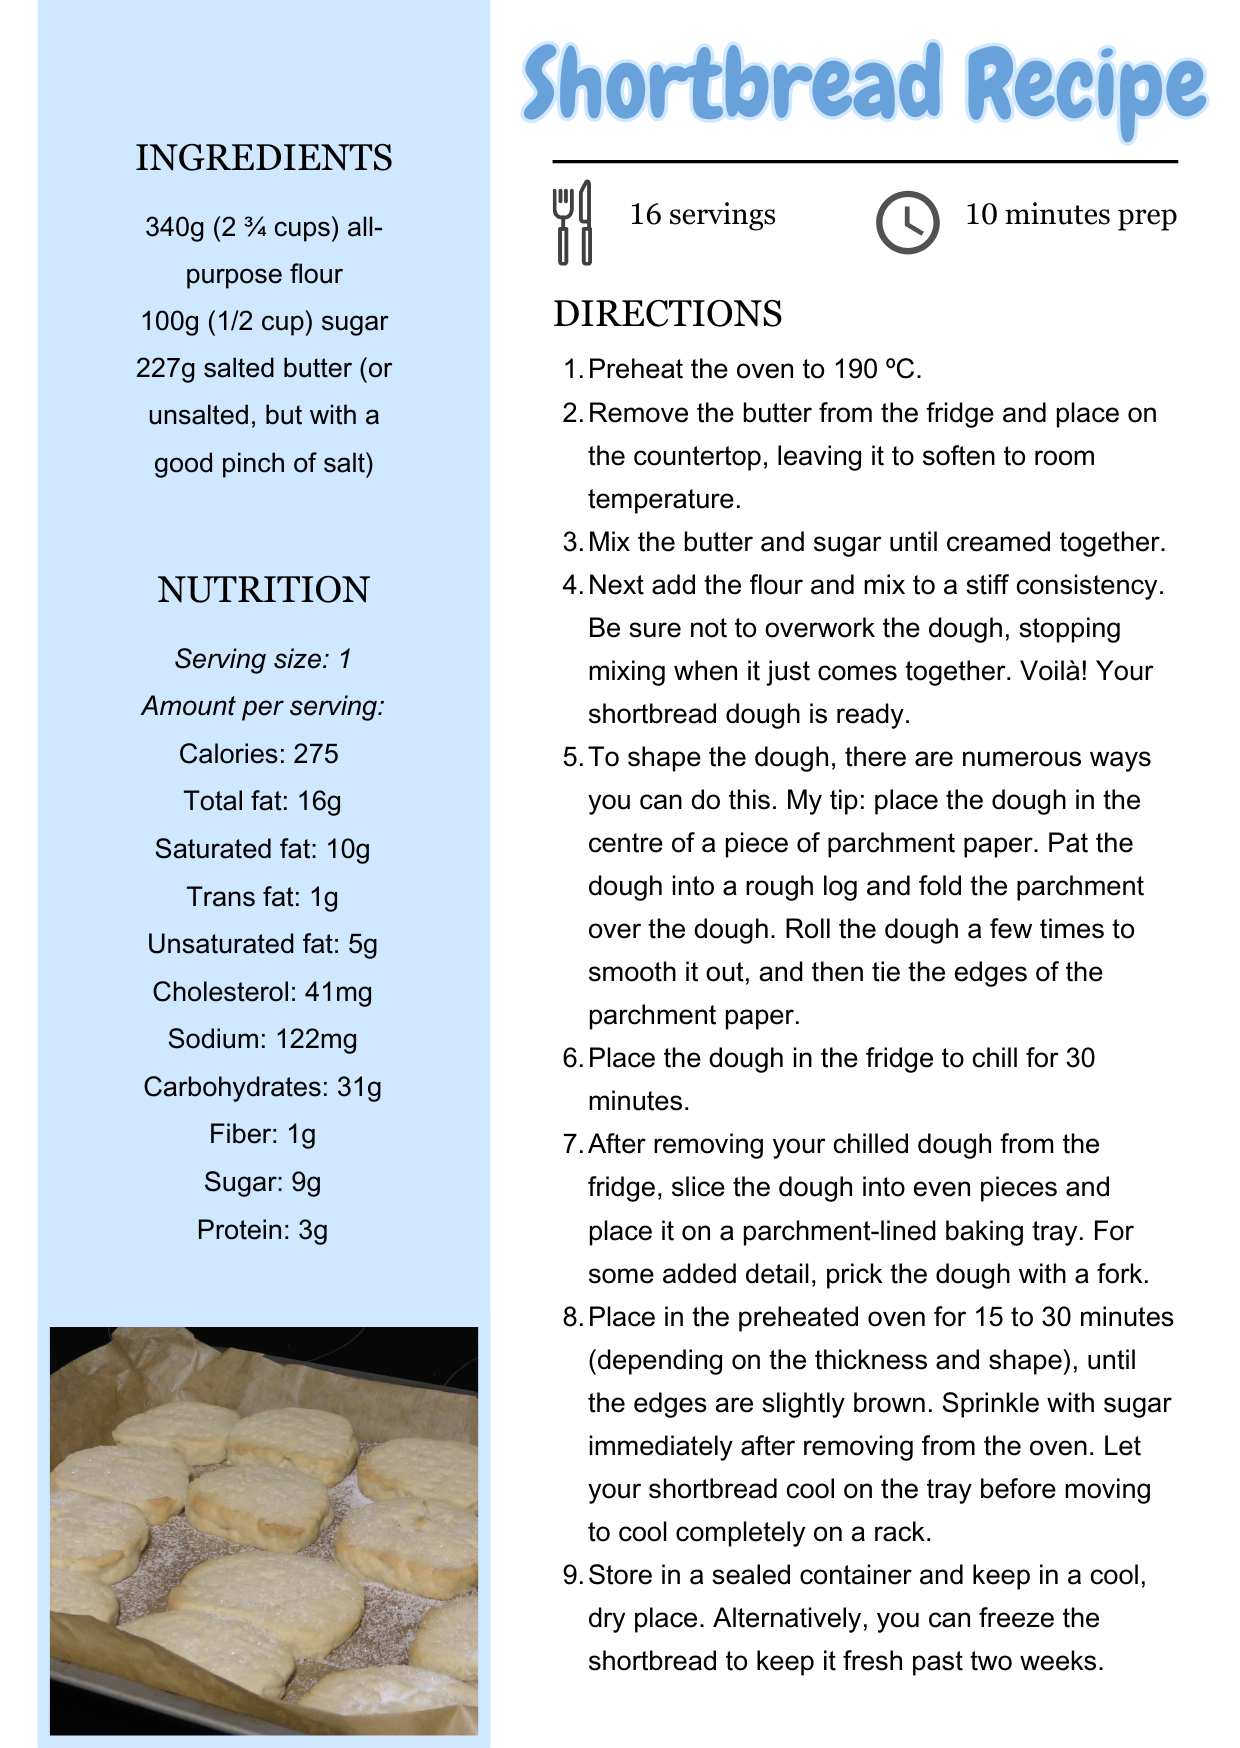
- Minimal ingredients – With just three basic ingredients (butter, sugar, and flour), you won’t need to splurge on a long grocery list.
- Quick and easy – No need for special equipment; you can mix this up with just a bowl and spoon. Ideal for both beginners and seasoned bakers.
- Versatile – Shortbread is a perfect blank canvas. You can keep it classic or try adding chocolate chips, citrus zest, or even rosemary for a unique twist.
- Keeps fresh for weeks – Shortbread has a long shelf life, so you can bake a big batch and enjoy it gradually, keeping your biscuit tin stocked for weeks.
- Easy to customise – From pressing designs into the dough to cutting it into fun shapes, shortbread can be as simple or as creative as you want.
Ingredients needed
Butter – I recommend using salted butter in your shortbread to add a subtle, savoury edge that enhances the buttery richness and balances the sweetness. If you don’t have salted butter on hand, you can use unsalted butter with a good pinch of salt added to the mix. Since you’ll be creaming the butter and sugar together, be sure to bring the butter to room temperature first – this will make mixing much easier and save your arm some effort!
Sugar – Yet another reason why shortbread is the ultimate budget bake – you can usually use whatever sugar you have tucked away in the cupboard. I tend to use caster sugar, as it creams together with the butter more easily, but traditional recipes often call for granulated sugar. So go with whatever you prefer!
Flour – Use plain (all-purpose) flour for the perfect texture and structure in your shortbread. This will ensure the cookies hold their shape and have that delicate crumb. Avoid self-raising flour, as the extra leavening isn’t needed for this recipe.
How to make
*You can also see the recipe card below for the full ingredients list, instructions, and nutrition details!*
STEP 1: Preheat your oven
Start by preheating your oven to 190°C (375°F). This ensures the oven is at the perfect temperature when your cookies are ready to bake, helping them cook evenly and turn golden at the edges.
STEP 2: Soften your butter
Take the butter out of the fridge and let it sit on the countertop for a while to soften to room temperature. This step is crucial, as soft butter mixes better with sugar, creating a smooth, creamy base for your dough.
STEP 3: Cream the butter and sugar
Once the butter has softened, place it in a mixing bowl and add the sugar. Using a spoon or an electric mixer, cream the butter and sugar together until the mixture is pale and smooth. This should take about 2 minutes depending on your choice of mixer. Don’t over-mix, as too much air can cause the shortbread to puff up while baking.
STEP 4: Add the flour
Now, add the flour to the butter and sugar mixture. Mix it until everything comes together into a stiff dough. It’s important not to overwork the dough – stop mixing as soon as it begins to form a cohesive mass. At this point, your dough is ready to be shaped.
STEP 5: Shape the dough
There are plenty of ways to shape your shortbread, from cookie cutters to using a knife to shape the biscuits straight out of the oven.
Tip: If you don’t own a rolling pin or cookie cutter, there is a simple way to shape your dough. Place the dough in the centre of a piece of parchment paper. Pat the dough into a rough log shape, then fold the parchment over it. Roll the dough inside the paper to smooth it out. Once rolled, tie the ends of the parchment to secure it. This helps keep the dough compact and makes for easy slicing later. After your dough has chilled, remove it from the fridge and unwrap it from the parchment. Slice the dough into even pieces, about 1/4 to 1/2 inch thick.
STEP 6: Chill the dough
Place your dough in the fridge to chill for at least 30 minutes. Chilling helps the dough firm up, making it easier to slice and giving your shortbread that crisp texture after baking.
STEP 7: Slice and shape the shortbread
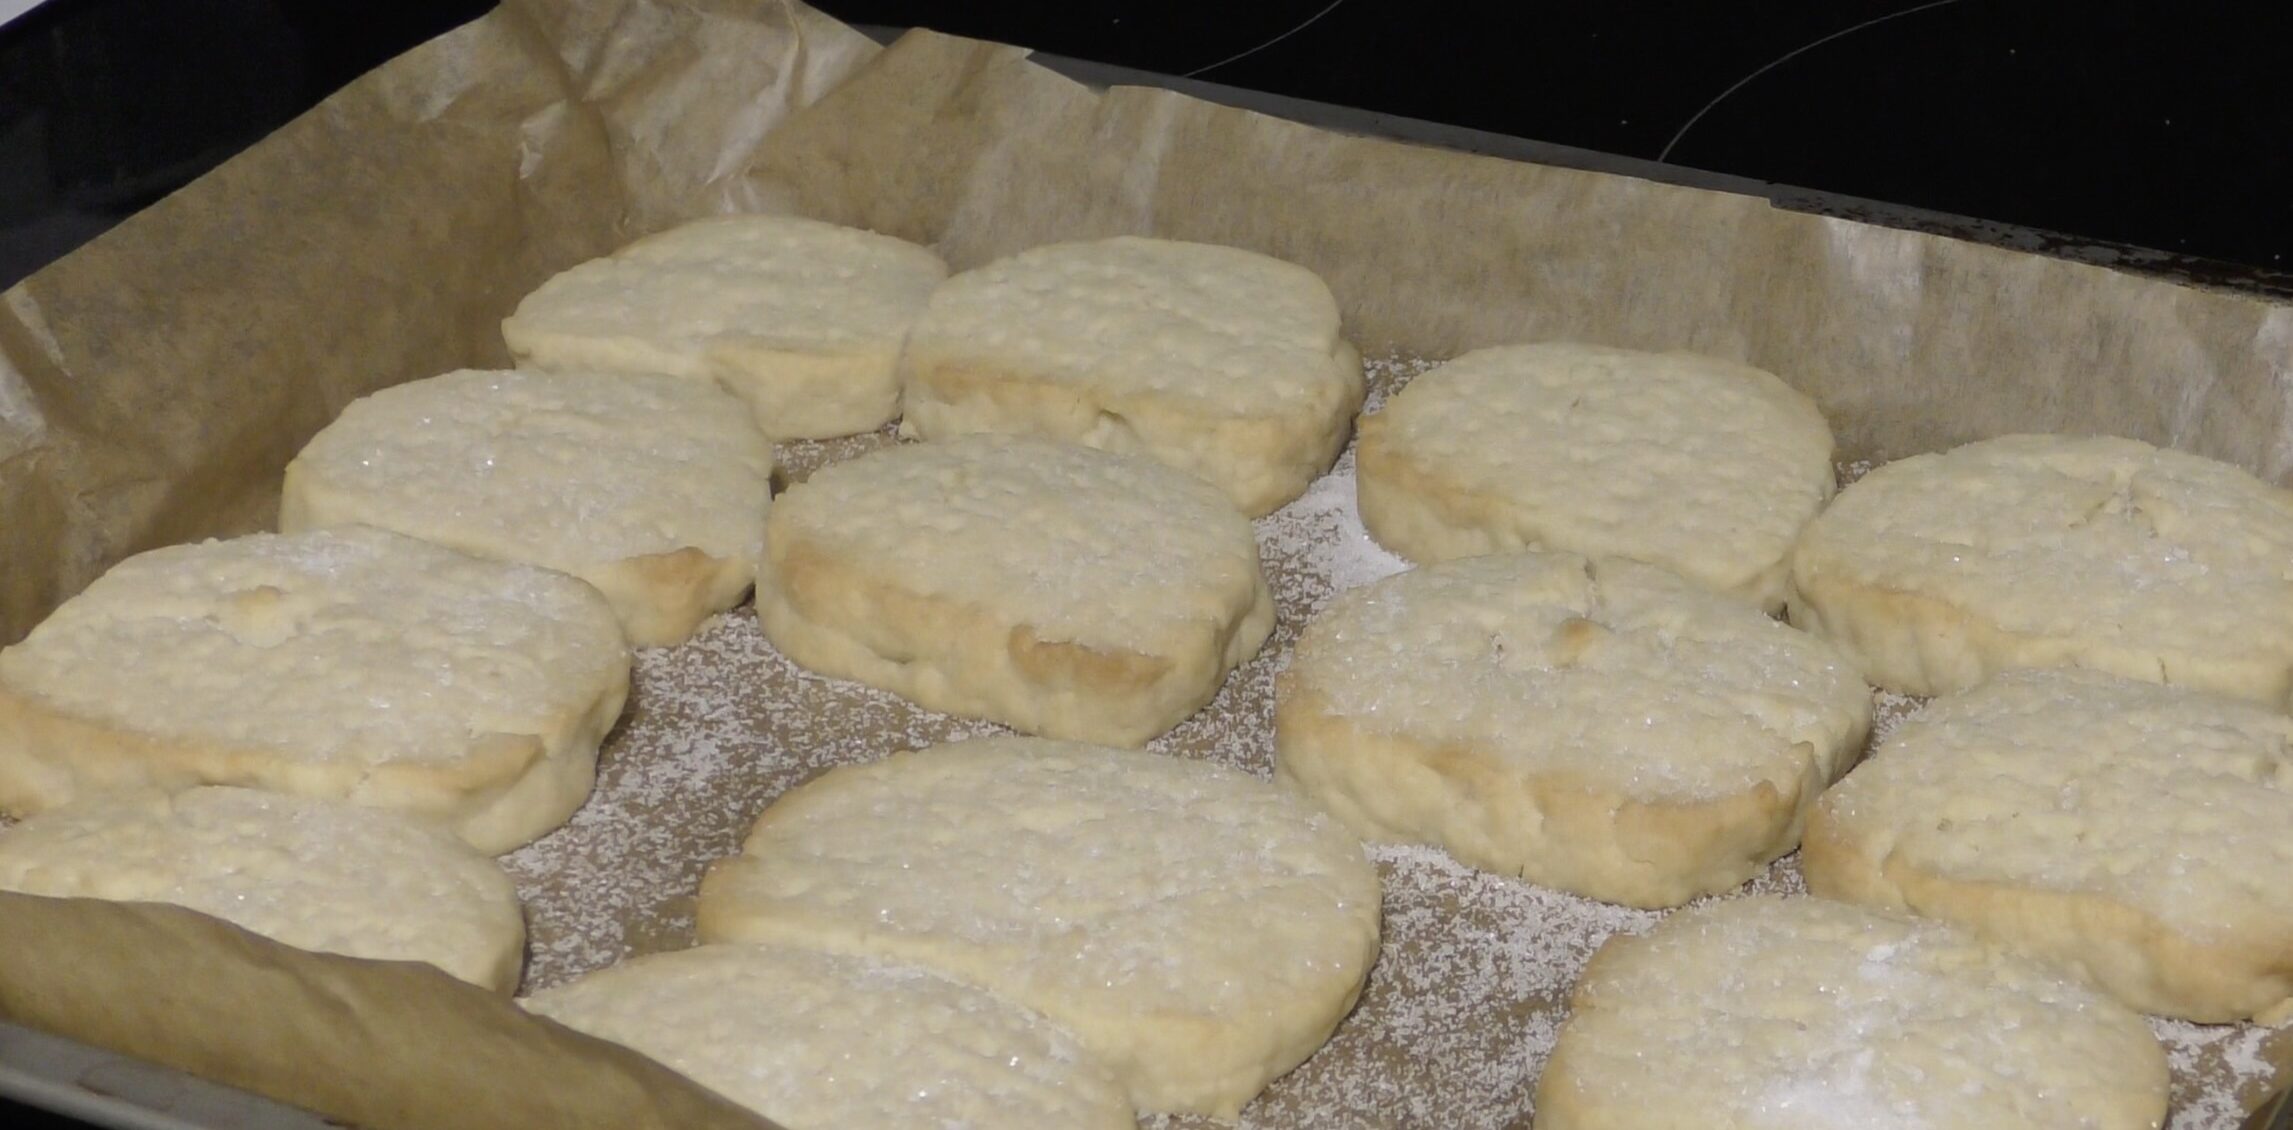
Place the dough on a parchment-lined baking tray. For a little extra detail, you can prick the tops with a fork to give them the classic shortbread design.
STEP 8: Bake the shortbread
Place the shortbread in your preheated oven and bake for 15 to 30 minutes, depending on the thickness and shape of your cookies. Keep an eye on them – once the edges begin to turn a light golden brown, they’re ready to come out. As soon as they’re out of the oven, sprinkle them with a little extra sugar while they’re still warm for that perfect touch of sweetness.
STEP 9: Cool and store
Allow the shortbread to cool on the tray for a few minutes before transferring them to a wire rack to cool completely. This helps them firm up and maintain their perfect texture. Once cooled, store your shortbread in an airtight container at room temperature for up to two weeks. For longer storage, you can freeze them to keep them fresh beyond that.
Storage and freezer instructions
To store: The shortbread dough itself can be made up to a week in advance by wrapping the dough in clingfilm and storing it in the fridge. Once baked, shortbread can be stored in an airtight container for up to two weeks at room temperature.
To freeze: Wrap the shortbread dough in clingfilm and place it in an airtight container. Freeze the dough for up to 3 months and defrost overnight in the refrigerator before baking. To freeze already baked shortbread cookies, store them in an airtight container and freeze them for up to 3 months, allowing the cookies to defrost to room temperature before serving.
Recipe
Have you tried this recipe yet? Leave a reply to let me know, or tag me in your bakes on Instagram and TikTok. I’d love to see what you’ve been getting up to in your kitchen – happy baking!
These look incredible. As a student on a tight budget, this is really helpful!
I’m glad you think so! Thanks for commenting 🙂